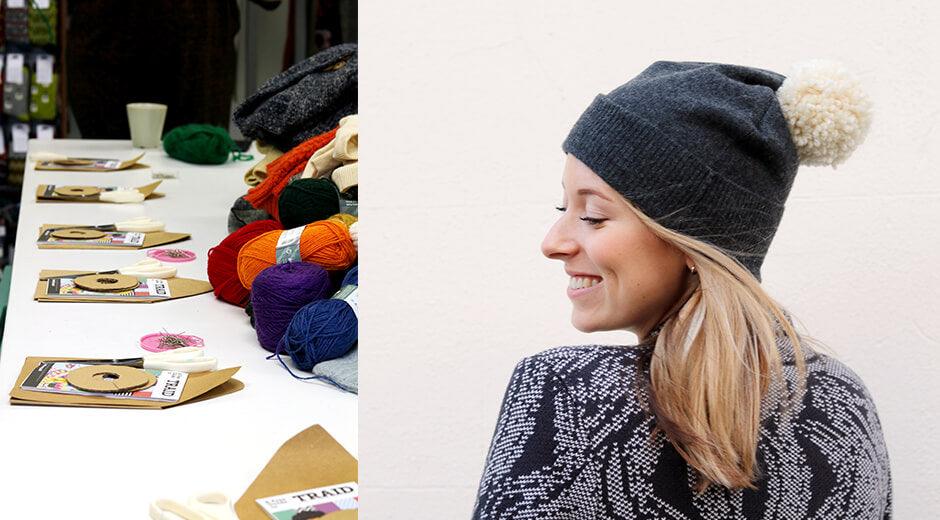
Traid’s DIY Pom Pom Hat Workshop: Upcycle Your Old Jumper
In early December, we welcomed the lovely Sarah from Traid to our offices. Sarah shared her skills and taught us how to craft our very own DIY pom pom hat from an old, love-worn woolly jumper. Continue reading to discover my super easy tutorial. Who knew upcycling and old jumper could be so simple?


 12. Now take these two long ends and tie them tightly in a knot (I tied mine several times). This will hold the pom pom together.
13. You can now slip the two templates off the pom pom and trim it down to the correct length. Again, don’t trim the two long pieces of wool!
14. You will now need to thread one of these long pieces of wool into a large needle and use the hole in the top of the hat to sew the pom pom to the peak of the hat. Do this with both long pieces of wool until the pom pom is securely sewn on.
15. Finally, wear your DIY pom pom hat with pride!

 Did you try out our BIY bobble hat tutorial? Let us know how you got on in the comments below or tweet us @wearethought.
You might also love reading our Upcycled Tote Bag Tutorial.

Traid’s DIY Pom Pom Hat Workshop: Upcycle Your Old Jumper
What you’ll need
For the main part of the hat:- An old jumper that you’d like to repurpose
- Scissors
- Pins
- Paper template as pictured (50cm wide, 25cm tall)
- Sewing machine with thread
- Two circular cardboard templates as pictured (10cm wide)
- Ball of wool in your chosen colour


How to make the hat
1. Take your old, love-worn jumper and cut along the side seam, finishing at the neck. You should now be able to open it out flat. 2. Take your paper template and lay it flat along the bottom hem of the jumper, as pictured. (For jumpers that have a ribbed hem: If you’d like to fold your hat up at the bottom, then you can simply shift the template up on the jumper so that it doesn’t cover the ribbed part of the jumper, allowing extra room.) 3. Pin your template in place. 4. Gently cut around the template. Ensure that you don’t pull the knit too much as it might start to unravel. 5. Fold the piece of material in half so that the two straight ends meet and pin these ends together (ensure that the inner part of the hat is facing outwards). Now use the sewing machine to sew these two ends together – sew down the edge from the highest point, to the bottom. If you are folding the hat up at the bottom, leave the ribbed part un-sewn. 6. Now pin the remaining edges together to form a peak. Sew down each of these edges. 7. If you are folding the hat up and the bottom, you can then turn the hat the other way out and sew down the open ribbed edge.
How to make the pom pom
8. Take your two circular cardboard templates and wedge a long piece of wool between them, so that it follows the circle. Make sure that it doesn’t slip out from between them! 9. Put this to one side and cut 5 or 6 pieces of wool of the same length (about 1 - 1.5 meters). Begin winding this tightly around the circular templates. Make sure you don’t lose the long piece of wool that’s wedged between the templates! 10. Keep doing this until you can no longer see the template and your circle is thick with wool (this means you will have a nice, thick pom pom). 11. Now take your scissors and cut the pieces of wool along the outer edge of the circle. Two important things to remember: don’t let go of the middle of the circle! (If you do it will fall apart!) And secondly, do not lose or cut the two long ends from the piece of wool that’s wedged in between the templates. 12. Now take these two long ends and tie them tightly in a knot (I tied mine several times). This will hold the pom pom together.
13. You can now slip the two templates off the pom pom and trim it down to the correct length. Again, don’t trim the two long pieces of wool!
14. You will now need to thread one of these long pieces of wool into a large needle and use the hole in the top of the hat to sew the pom pom to the peak of the hat. Do this with both long pieces of wool until the pom pom is securely sewn on.
15. Finally, wear your DIY pom pom hat with pride!

 Did you try out our BIY bobble hat tutorial? Let us know how you got on in the comments below or tweet us @wearethought.
You might also love reading our Upcycled Tote Bag Tutorial.

